Connecting AJAX sensors to ip video phone Hikvision
14.01.2022
To make the security system convenient and at the same time functional, you should take care to choose the best equipment. The Hikvision digital intercom can be combined with Ajax security to make the control of all systems unified, using only a video intercom.
Reasons for combining devices
First of all alarm AJAX and video intercom Hikvision, which in fact is a touch screen control panel, combined into a single system for convenience. With a single device you can:
- to enable and disable the security mode;
- receive notifications on the main screen;
- check visitors with the intercom camera;
- connect to the system remotely via the proprietary Hik-Connect intercom app.
Although all of these functions are available separately in each system, once combined, the intercom's versatility is achieved.
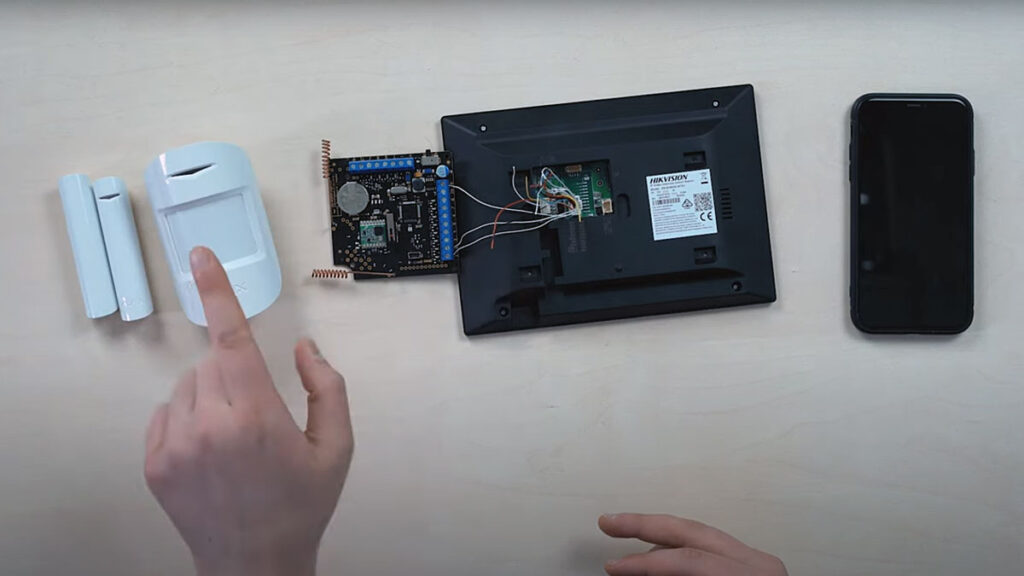
This result can be achieved with the necessary AJAX sensors, a special Ajax ocBridge Plus integration module, a miniUSB cable and a computer with special software. With such a starter kit, the task will be completed in a minimum amount of time.
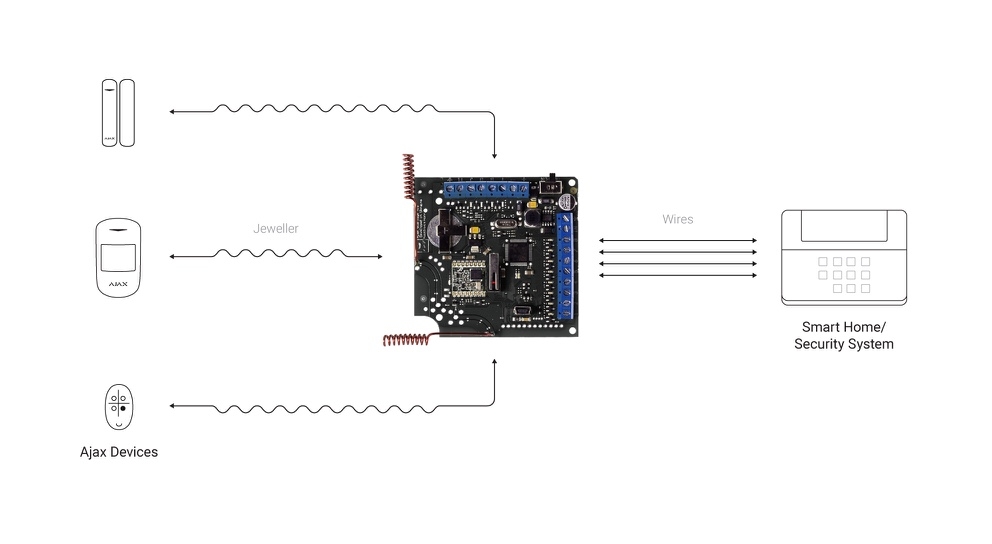
The working scheme
As a result of properly completed work, the system will be almost wireless, despite the fact that the video intercom from Hikvision is just a wired device. The sensors will transmit the signal when triggered to the integration module. Its task is to convert the communication from wireless to wired format.
Received message the module broadcasts on the screen videophone, and from there it goes to the application phone, thus translated into wireless format via the Internet. Despite the intricacy of the circuit, it works without any problems if all the connection was done correctly.
The composition will work well if the additional devices are properly separated and properly spelled out. An example would be a system of an ocBridge and two Ajax sensors connected wirelessly to their hub beforehand. It is worth prescribing them as two different zones to avoid conflicts.
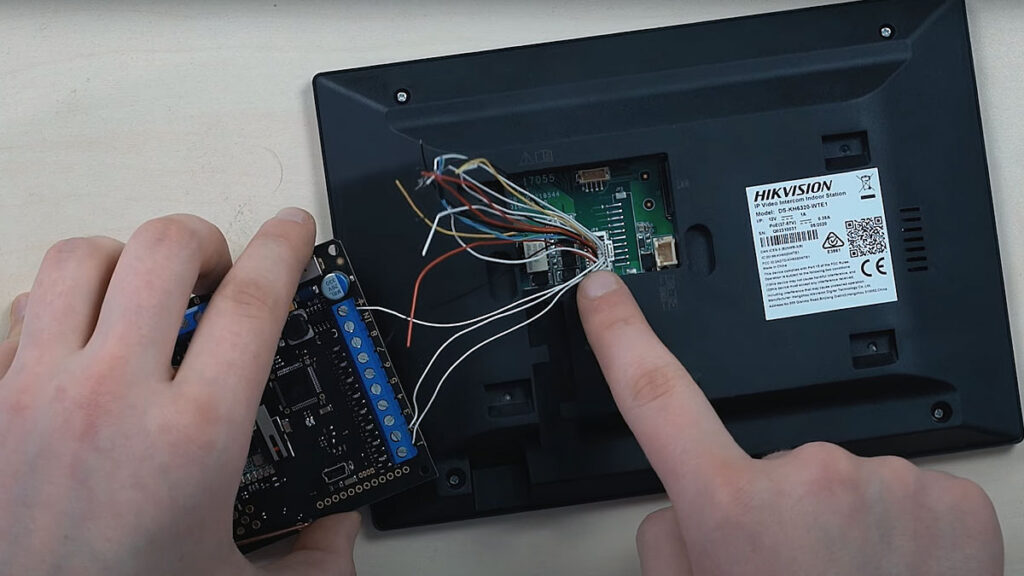
The IP video intercom has wired alarm inputs, which are supplemented by a graphic diagram. In the "ground" input you should connect the appropriate wire and lead it to the "ground" of the integration module, and then through the wires connect also the inputs of both zones, which are responsible for information transfer from the sensors.
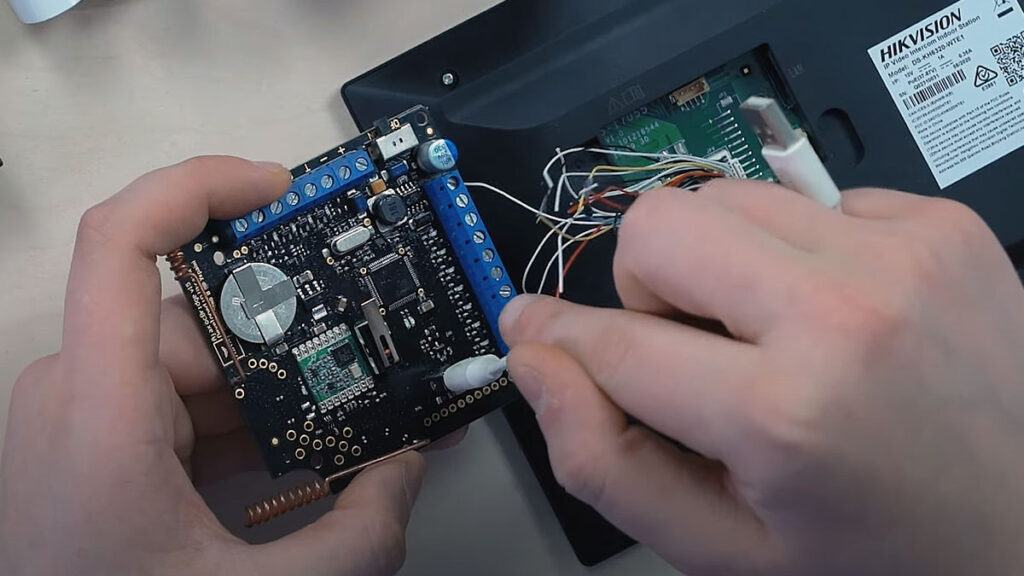
Connecting and configuring the bridge via PC
The procedure does not end with the connection of different devices, because learning to recognize signals and respond to them correctly will only help with fine-tuning. This requires a miniUSB cable connected directly to the ocBridge and any computer.
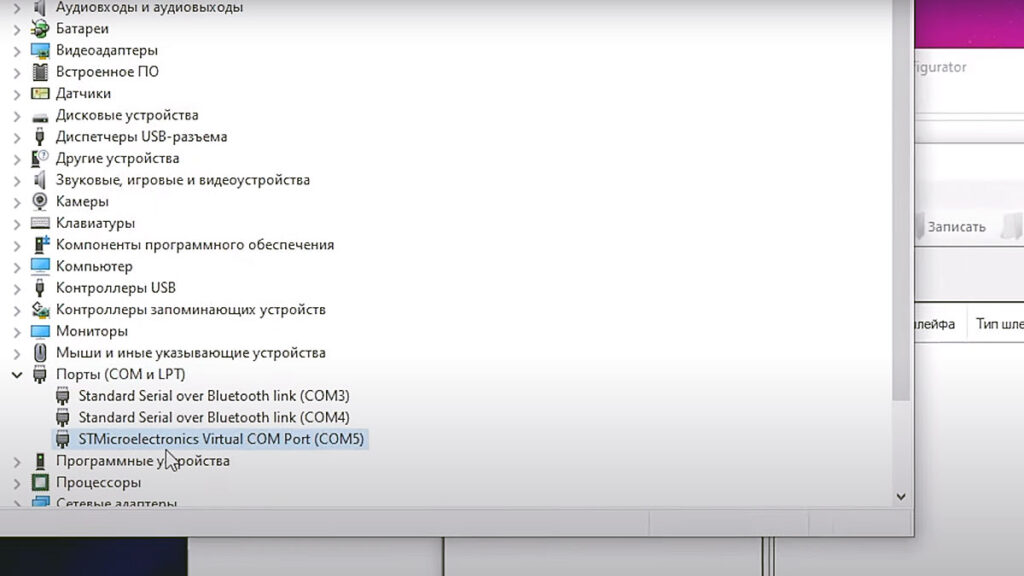
The configuration process is done through the configurator for the ocBridge, which also requires special drivers that are downloaded and installed separately. Having connected the wire to both devices, it is necessary to turn on the module and wait until the LED in the case lights up. Then it is necessary to enter the Device Manager on the PC, where in the section "Ports" you will find a new position with the name STMicroelectronics, and next to it there will be a number indicating the order of the port, where the connection is made.
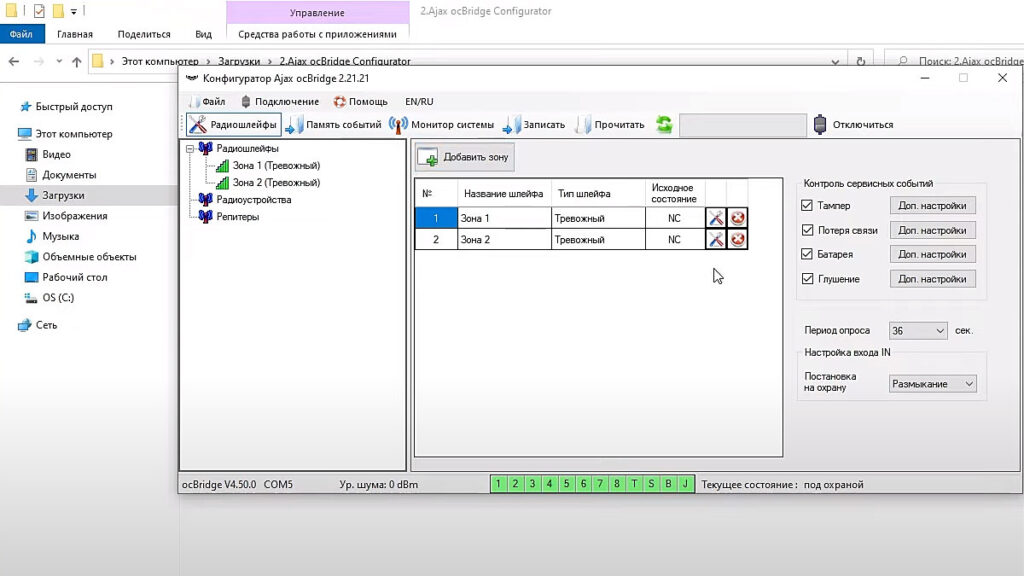
Now you can return to the configurator, go to the connection tab and select the field "Setting". In it you immediately select the port where the bridge is connected, then the hub is rebooted and after its activation in the configurator you press the connection button, by pressing which you will be able to connect the two devices.
Next, select the button to add a zone, and through the window that appears, determine the type of loop and zone. From the list of the latter, select the one that needs to be configured by clicking on it twice. Then the device is added, and the information for connection is on the body of the sensor itself, but in order not to enter the ID and save time, you can fill the field with the Latin letter f, entering it the maximum number of times.
It remains only to click on the search button and at this point click the sensor switch, and then the device is found by the system. It will need to be set up additionally, and in fact it is only worth activating within 24 hours. This ends the configuration of one sensor and similarly it is possible to add all other devices to the system.
This completes the entry of the required data into the controller, at the end the information is written by pressing the appropriate button. Both sensors are registered under different zones and the controller will be able to recognize the signal sent from them when triggered. The computer is no longer needed, so it can be switched off.
Setup on the intercom
The configured bridge is connected to the "ground" and the input areas on the video intercom with the complete wires. All that remains is to configure the doorphone itself:
- Opens the settings menu and the third tab in the window that opens.
- The shortcut options field is clicked.
- The alarm page opens.
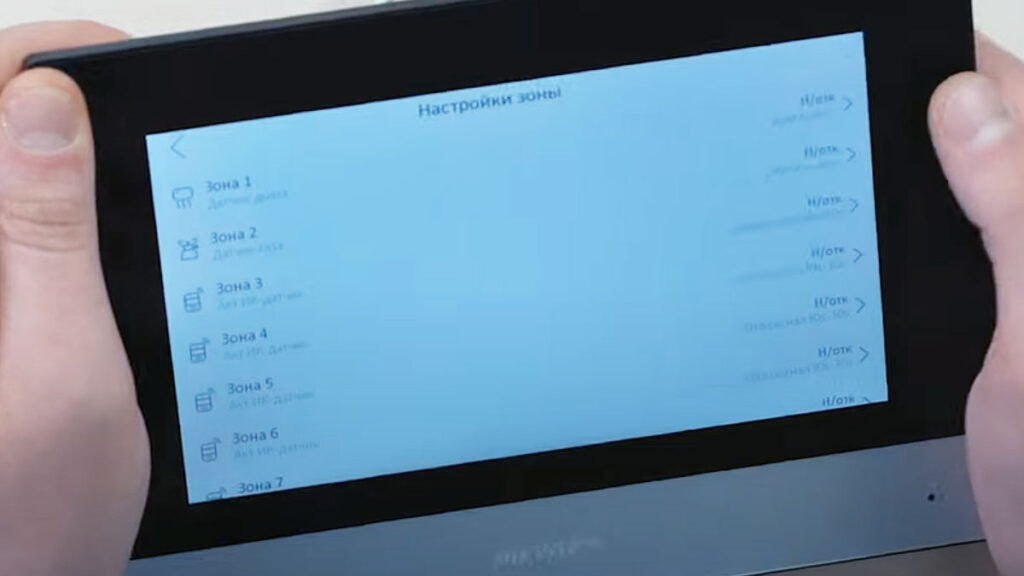
- In the zone settings, the one that was previously wired to the integration module is selected.
- Selects the type of sensor connected to the zone, the signal (instantaneous), the normal position (usually closed).
- The result is saved by simply going back to the menu.
In the menu select the item "Scene settings", where the zones are activated for different modes, for example, home or in case of absence in the house. Additionally a password is set to activate the alarm module or deactivate the system, this completes the setup procedure.
Testing
The intercom is set in the armed mode, after which you can check the available sensors for triggering. In the case of motion or sound detectors, you can wave your hand in front of them, disconnect the magnetic ones, and put the water meter in the liquid. An alarm should appear on the screen of the intercom, the same will be displayed and the phone connected to the video panel with Wi-Fi and the appropriate application.

The scheme of connecting sensors AJAX to video intercom Hikvision is simple and involves combining different devices into a single system. It is enough to follow simple instructions and get a wired security system, while using modern wireless sensors, which are connected to the old video intercom.
New articles
Videos

09.02.2024